Why We Are Talking About Fall Protection
- In 2024, nearly 400 construction workers in the US died from falls. In Canada, falls cause 18% of all workplace fatalities.
- These aren’t just statistics; they are people who didn’t go home because of a missing guardrail, an unclipped lanyard, or an ignored leading edge.
- A fall happens in a fraction of a second. By the time you realize you are falling, it is too late to react. Your equipment is the only thing standing between you and the ground.
The Hierarchy of Fall Protection
Remind the crew that a harness is the last line of defense, not the first. Go through the hierarchy:
- Eliminate the hazard: Can we do this work on the ground instead?
- Passive protection: Are the guardrails secure? Are holes covered and marked?
- Fall restraint: Can we use a system that prevents you from reaching the edge in the first place?
- Fall arrest: If we must work near the edge, you must wear a harness and tie off.
The ABCs of Fall Arrest Systems
If workers are using Personal Fall Arrest Systems (PFAS), they need to understand the ABCs. Cover these three components:
A is for Anchor
Your tie-off point is critical. It must be capable of supporting 5,000 pounds per person, or be engineered for the specific load. A plumbing pipe or a flimsy roof truss is not an anchor. Always tie off above your D-ring to minimize free fall distance.
B is for Body Support (Harness)
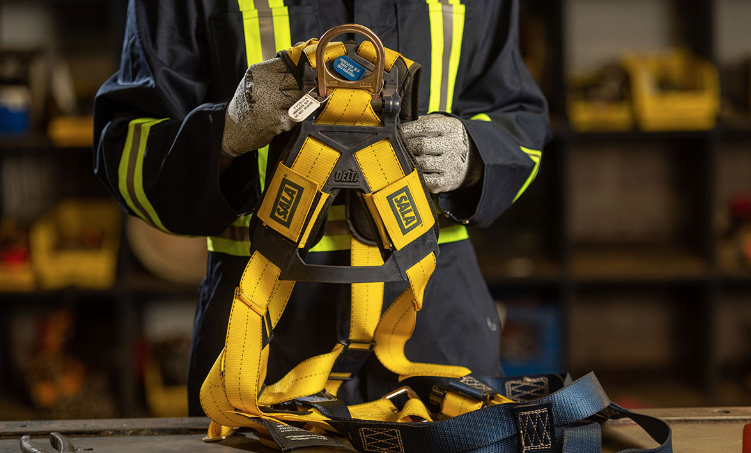
The harness distributes the force of a fall across your shoulders, thighs, and pelvis. But it only works if it fits correctly. The D-ring must sit between your shoulder blades. The chest strap must be at mid-chest level. You should be able to slide a flat hand under the leg straps, but not a closed fist.
C is for Connection
The lanyard or self-retracting lifeline (SRL) connects the harness to the anchor. Never tie knots in lanyards. Never hook two lanyards together. And always verify your fall clearance—make sure the distance to the ground is greater than your lanyard length plus deceleration distance plus your height.
Pre-Use Equipment Inspection
Every worker must inspect their own fall protection equipment before every shift. Tell the crew to look for:
- Webbing: Check for cuts, frays, burns, or chemical damage. Run the webbing through your hands to feel for hard spots.
- Hardware: Inspect D-rings, buckles, and snap hooks for rust, cracks, or deformation. Make sure snap hooks close and lock automatically.
- Tags: The manufacturer’s tag must be present and legible. If the tag is gone, the equipment is out of service.
- Impact indicators: Check the stitching on the shock absorber. If it has been deployed or shows signs of a previous fall, remove it from service immediately.
“If there is any doubt about your equipment, don’t use it.
Site-Specific Hazards Discussion:
- Where are the leading edges today?
- Are there any new floor holes that need covers?
- Who is working on the scissor lifts or scaffolding?
- Do we have the right anchor points established for the roof work?
**If you are a Contract or Brokered labor employee of the Berg Group. Please consult your company/employer specific fall protection training or planning procedure or policy. All fall protection plans and training must comply with OSHA standards, Berg Group policy and client/GC standards. Please reach out to your specific company supervisor or representative with questions concerning your company fall protection training and fall protection planning policy.